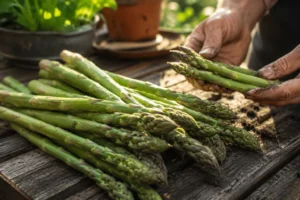
The first time I cut a spear of my own asparagus and had it on my plate twenty minutes later, I understood why gardeners talk about this vegetable with something close to reverence. It was sweeter than anything I’d bought at the store, snap-tender, and gone in about four bites. That one bundle of spears took three years of patience to arrive, and I would do it all again without hesitation.
Learning how to grow asparagus is one of those garden projects that rewards you for decades once you get it established. This isn’t a plant-it-and-forget-it crop, and it isn’t an instant one either. But if you have a sunny corner of the yard you can dedicate for the long haul, or even a container on a patio, you can absolutely pull this off, whether you’re a first-time vegetable gardener or someone who’s grown tomatoes for years but never touched a perennial vegetable bed.
At Plant Style Home we help you grow beautiful and delicious plants right in your own garden at home, and this guide walks you through every method there is, from crowns to seed to containers, so you can pick the path that fits your space and your patience level.
What You Need to Know Before Growing Asparagus
Before you dig a single hole, it helps to understand what kind of plant you’re dealing with. Asparagus isn’t like your average vegetable garden resident.
It’s a perennial, not an annual. Once established, the same asparagus crowns will keep sending up spears every spring for 15 to 20 years, sometimes longer. You’re not replanting this every season, which is exactly why the upfront patience pays off so well.
The timeline is real, and it matters. Most guides on how to grow asparagus will tell you the same thing I’ll tell you here: expect two to three years before your first real harvest. The first year, you let the plant grow entirely undisturbed so it can build a strong root system. The second year, you might take a light harvest. By year three, you’re finally cutting spears for weeks at a time.
One thing beginners don’t realize is that this waiting period isn’t wasted time. The plant is doing invisible work underground, building the crown and root system that will feed you for years. Rushing an early harvest weakens the plant permanently, so resist the urge.
Climate and growing zones. Asparagus grows best in USDA zones 3 through 8, where winters are cold enough to give the plant a proper dormant period. It genuinely needs that cold snap to reset for the next growing season, so if you live somewhere with very mild winters, you may need to choose heat-tolerant varieties or treat it more like a container specialty crop.
There’s more than one way in. People searching for how to grow asparagus plants usually land on one of several starting points: crowns, seed, root divisions, or containers. Each has its own timeline and level of difficulty, and I’ll walk through all of them below.
| Method | Difficulty | Time to First Harvest |
|---|---|---|
| Crowns | Easy | 2 years |
| Seed | Moderate | 3 years |
| Root division | Moderate | 2 to 3 years |
| Container | Easy to Moderate | 2 to 3 years |
How to Grow Asparagus from Crowns
If you ask any experienced grower how to grow asparagus, most will point you straight to crowns. This is the method I recommend to nearly everyone starting out, and it’s the one that gets you to harvest fastest.
What exactly are asparagus crowns? A crown is essentially a one-year-old asparagus plant that’s been grown from seed and then dug up and sold dormant, root system and all. It looks a bit like a spider made of roots, with a small central bud cluster on top. Planting a crown skips that first fragile year of seedling growth, which is why it shaves a full year off your wait.
Where to buy crowns. Look for crowns at local nurseries in early spring, or order from a reputable mail-order seed and plant company. You want crowns that are plump and firm, not shriveled or moldy. Male hybrid varieties like Jersey Knight or Jersey Giant are popular because male plants put their energy into spear production instead of seed production, which means bigger harvests.
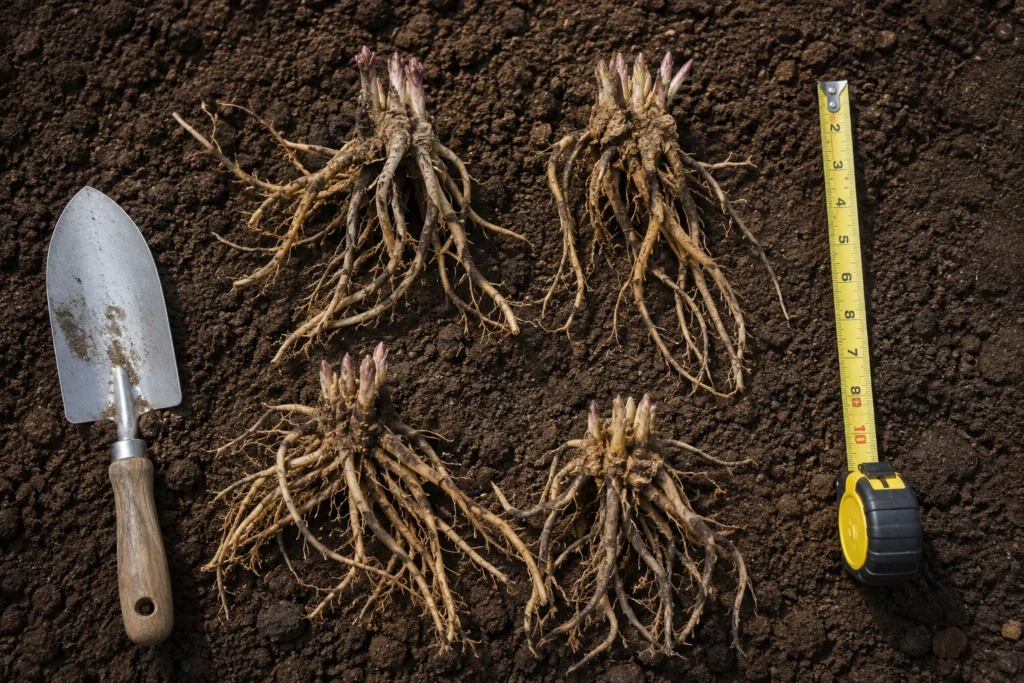
Step by step planting guide:
- Choose a sunny site that gets at least six to eight hours of direct sun and has well-draining soil.
- Dig a trench about 12 to 18 inches wide and 6 to 8 inches deep.
- Work in a generous layer of compost or aged manure at the bottom of the trench.
- Form small mounds of soil every 12 to 18 inches along the trench.
- Set each crown on top of a mound with the roots draped down the sides, spider-like.
- Cover with 2 to 3 inches of soil, not the full trench depth yet.
- As shoots emerge over the following weeks, gradually fill in the trench with more soil until it’s level with the surrounding ground.
Best time to plant crowns. Early spring is ideal, right after the soil has thawed and become workable, typically a few weeks before your last frost date.
The trench method explained. The reason gardeners bury crowns in a trench and fill it gradually, rather than planting at full depth immediately, is that it lets the plant establish shallow roots first while still ending up deep enough to protect the crown long-term. It’s a small extra step that makes a real difference in how vigorous the plant becomes.
Learning how to grow asparagus from crowns really is the fastest route from bare soil to dinner plate, and it’s forgiving enough for a first attempt.
How to Grow Asparagus from Seed
Starting asparagus from seed is the slower, more hands-on route, but there’s something satisfying about it too. If you want to grow an unusual variety that isn’t sold as crowns, or you simply enjoy starting things from scratch, this method is worth knowing.
Pros and cons versus crowns. Seed-grown asparagus costs far less per plant and gives you access to more variety choices. The tradeoff is time. You’re adding roughly a full extra year to your wait, since you’re starting from scratch rather than a year-old crown.
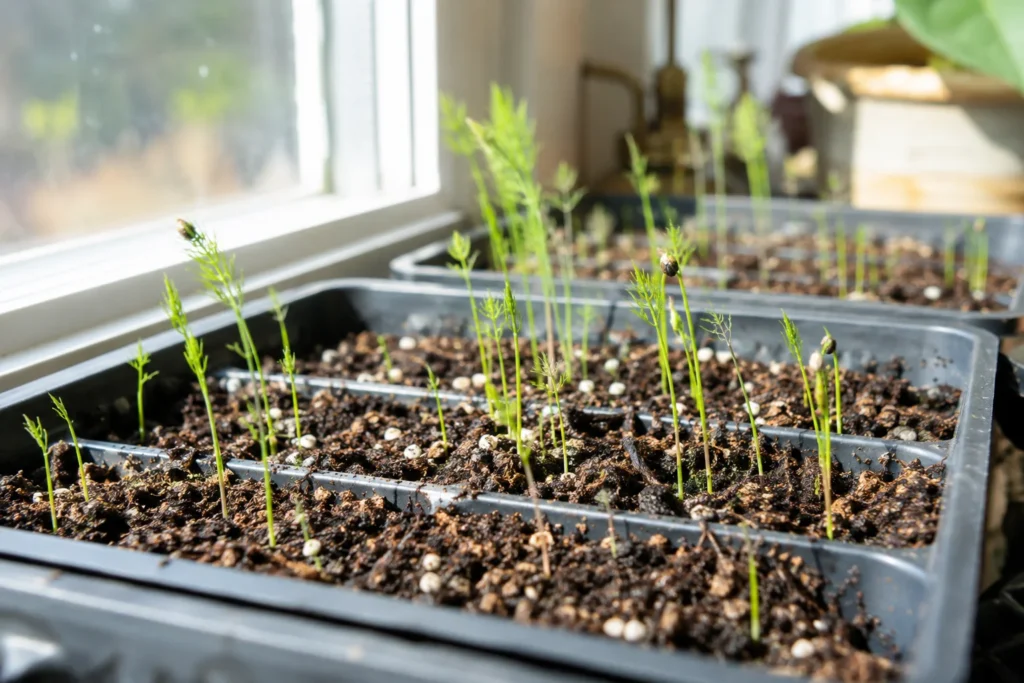
How to start seeds indoors. Start asparagus seeds indoors about 12 to 14 weeks before your last expected frost date. Soak the seeds in warm water for 24 to 48 hours first to soften the seed coat and speed germination. Sow them about half an inch deep in seed trays filled with a light seed-starting mix.
Germination timeline. Asparagus seeds are slow to sprout. Expect anywhere from two to eight weeks depending on soil temperature, with warmer soil around 75 to 85 degrees Fahrenheit speeding things along considerably. Patience is key here because rushing to judge failure too early is the most common mistake with seed-started asparagus.
Transplanting seedlings outside. Once your seedlings are about 10 to 12 weeks old and all danger of frost has passed, harden them off gradually over a week by setting them outside for increasing periods each day. Then transplant them into the garden the same way you would crowns, in a shallow trench that gets filled in gradually as the plants grow.
Tips for seed success:
- Keep the growing medium consistently moist but never soggy while seeds germinate.
- Use a heat mat if your indoor space runs cool, since warmth speeds germination significantly.
- Thin seedlings so each has enough room to develop a strong root system before transplanting.
If you’re set on learning how to grow asparagus from seed specifically for a rare variety, just mentally prepare for that extra year. It’s worth it for the right reasons, but it isn’t the fastest path to spears.
How to Grow Asparagus from Roots
Sometimes gardeners already have an established asparagus bed, either their own or a generous neighbor’s, and want to expand it by dividing existing plants rather than buying new crowns or seed.
What are asparagus roots in this context? This refers to dividing the root mass of a mature, established asparagus plant, typically one that’s at least three or four years old, into separate sections that each contain part of the crown and a healthy portion of roots.
Dividing and replanting roots. This is best done while the plant is dormant, either in very early spring before growth starts or in late fall after the fronds have died back. Dig up the entire root clump carefully, trying to keep as much of the root system intact as possible.
Step by step guide:
- Dig around the dormant plant with a wide berth to avoid slicing through roots you want to keep.
- Lift the whole clump out and gently shake or rinse off excess soil so you can see the crown structure.
- Using a clean, sharp knife, divide the crown into sections, making sure each division has several healthy buds and a good amount of root attached.
- Replant divisions immediately using the same trench method described for crowns, since exposed roots dry out quickly.
- Water thoroughly after replanting to help the roots settle.
Best time of year. Early spring, just as the ground thaws and before new spears emerge, gives divisions the longest growing season to recover. Fall division works too in milder climates, but spring is generally more forgiving.
Anyone researching how to grow asparagus from roots is usually working with an existing patch, and honestly, this is one of the most economical ways to expand a bed since you’re propagating plants you already know perform well in your specific soil and climate.
How to Grow Asparagus from Cuttings
I’ll give you the honest answer here rather than a workaround dressed up as a solution: asparagus does not propagate reliably from stem or spear cuttings the way you might root a pothos or a tomato sucker. The spears we eat are actually the plant’s new shoots, and cutting one off and sticking it in water or soil won’t produce roots or a new plant. This is different from many houseplants where a cutting readily forms new roots.
So what’s the best propagation method instead? If your goal in searching how to grow asparagus from cuttings was really about multiplying an existing plant, root division is your real answer. It’s covered in detail in the section above, and it’s the closest thing to propagating asparagus “vegetatively” the way a cutting would work for other plants.
Is there any exception? Some growers experiment with rooting young fern-stage growth in ideal greenhouse conditions with rooting hormone, but success rates are low and inconsistent even for experienced propagators, and it’s not a method I’d recommend for a home garden. Seed and crowns remain the tried-and-true starting points, with root division as your propagation option once you have an established bed.
How to Grow Asparagus in a Container
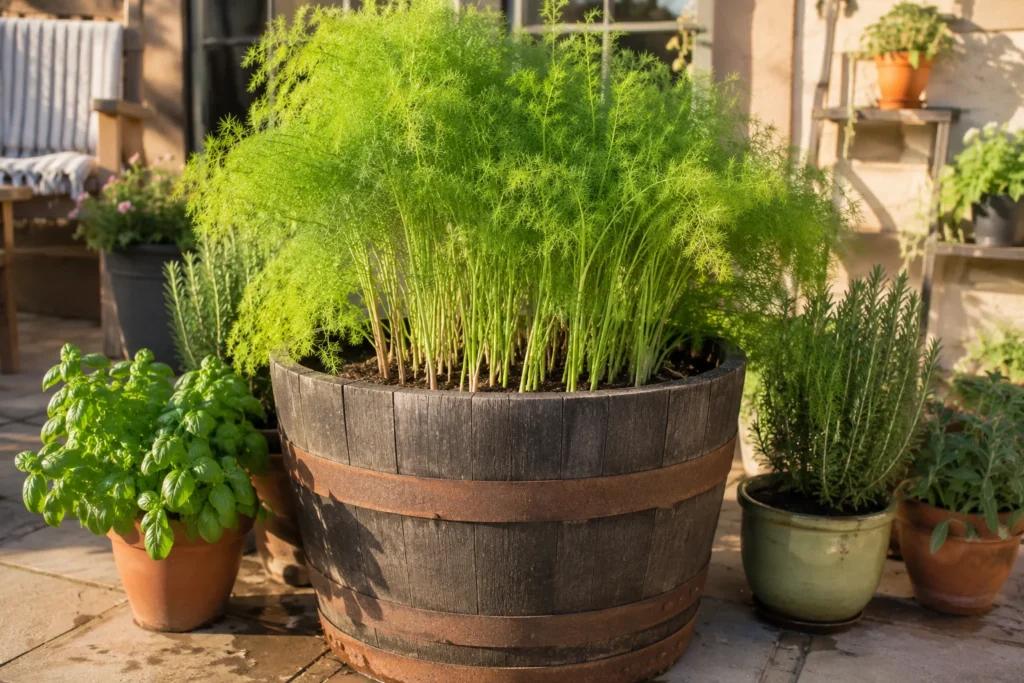
Not everyone has a dedicated garden bed to spare for fifteen years, and that’s exactly why learning how to grow asparagus in a container is worth knowing, even though it comes with its own quirks.
Container size requirements. Asparagus has a deep, spreading root system, so you need serious depth. Look for a container at least 18 to 24 inches deep and equally wide, holding a minimum of 15 to 20 gallons of soil. A half whiskey barrel or a large raised planter box works beautifully.
Best soil mix for containers. Use a loose, well-draining mix rather than dense garden soil. A combination of quality potting mix, compost, and a bit of coarse sand or perlite mimics the sandy, well-drained soil asparagus naturally prefers.
Watering container asparagus. Containers dry out faster than garden beds, so check soil moisture every couple of days during the growing season, watering deeply whenever the top two inches feel dry. Consistent moisture matters most during spear production in spring.
Fertilizing in containers. Container plants exhaust their nutrients faster since there’s no surrounding soil to draw from. Getting the fertilizer right is crucial for asparagus, so read our complete guide on How to Dose Fertilizer for Plants for detailed dosing advice on timing and amounts for both container and in-ground plants.
Challenges and solutions. The biggest challenge with container-grown asparagus is winter protection, since roots in a pot are far more exposed to freezing temperatures than roots in the ground. Move the container into an unheated garage or shed for winter, or wrap it heavily in insulating material if it has to stay outside. Growing in containers requires special care, just like growing Pravi Celer which also thrives in pots with the right technique, so don’t be discouraged if it takes a season to dial in your routine.
How to Grow Asparagus Fern
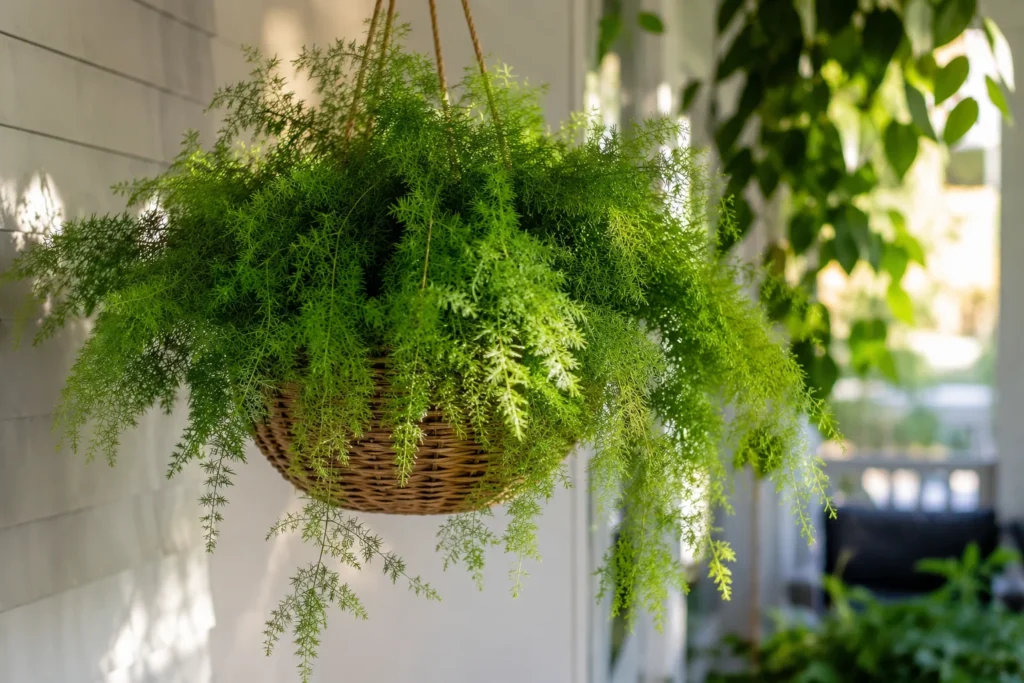
Here’s where things get a little confusing for new gardeners, and I want to clear it up plainly.
What is asparagus fern? Despite the name, asparagus fern isn’t actually a true fern, and while it’s related to edible asparagus, it’s a different species grown almost entirely for its feathery, ornamental foliage rather than for eating.
How it’s different from edible asparagus. The variety you eat, Asparagus officinalis, is grown for its emerging spears. Asparagus fern, usually Asparagus setaceus or Asparagus densiflorus, is grown as a decorative houseplant or landscape filler and is not intended for the dinner table. In fact, the berries it produces can be mildly toxic, so keep that in mind around pets and small children.
Growing guide for asparagus fern. It thrives in bright, indirect light and well-draining potting soil. Water when the top inch of soil feels dry, and mist occasionally if your indoor air is very dry, since it appreciates humidity. Feed it lightly during the growing season with a balanced houseplant fertilizer.
Indoor versus outdoor care. Indoors, it makes a graceful hanging basket or shelf plant. Outdoors, it works well in zones 9 through 11 as a lush border or groundcover, though it can go dormant and drop foliage if temperatures dip too low.
Decorative uses. Florists love the feathery sprays of asparagus fern as filler in bouquets and arrangements, and it’s a classic choice for hanging baskets on shaded porches. If someone told you they’re learning how to grow asparagus fern for its looks rather than its flavor, now you know exactly why.
How to Grow Asparagus Beans
Another name that trips people up is asparagus beans, and this one deserves its own clear explanation too.
What are asparagus beans? Also called yardlong beans or Chinese long beans, these are a type of cowpea, not asparagus at all, that produce incredibly long, slender pods often reaching a foot and a half or more in length.
How they differ from regular asparagus. Beyond sharing a vague resemblance in shape and a passing similarity in flavor to green beans, asparagus beans have nothing botanically in common with true asparagus. They’re annual vines related to black-eyed peas, grown fresh each season from seed rather than from perennial crowns.
Complete growing guide. Asparagus beans love heat, more than most bean varieties, and grow best when soil has warmed thoroughly in late spring or early summer. Plant seeds directly in the garden about an inch deep, spaced 6 inches apart, along a sturdy trellis or pole since these vines can climb 8 feet or more. They need full sun and regular watering, and they mature quickly once temperatures rise.
Harvesting asparagus beans. Pick the pods when they’re still young and slender, typically 12 to 18 inches long, well before the seeds inside swell and the pod turns tough and fibrous. Harvesting regularly, every couple of days during peak season, encourages the vine to keep producing more pods.
Asparagus Care Guide
Once your asparagus plants are in the ground, whether from crowns, seed, or divisions, ongoing care is what determines whether you get a strong harvest or a disappointing one.
Sunlight Requirements
Asparagus wants full sun, at least six to eight hours of direct light daily. Shaded beds produce thin, weak spears and are more prone to disease.
Watering Schedule
- Water deeply once or twice a week during the growing season, more often in extreme heat or sandy soil.
- Reduce watering once the ferny foliage yellows and the plant heads into dormancy in fall.
- Newly planted crowns and seedlings need more frequent, gentle watering until established.
Fertilizing Guide
Feed asparagus beds in early spring before spears emerge, and again lightly after harvest season ends to support foliage growth for the rest of the year. A balanced organic fertilizer or aged compost works well for most home gardens.
Mulching Tips
- Apply 2 to 3 inches of mulch, such as straw or shredded leaves, around plants to retain moisture and suppress weeds.
- Pull mulch back slightly in early spring so the soil can warm and spears can emerge freely.
- Refresh mulch after your final harvest of the season.
Weeding Advice
Asparagus doesn’t compete well with weeds, especially in its first two establishment years. Hand-weed carefully to avoid disturbing shallow roots, and keep beds tidy through the growing season so nutrients go to your plants, not intruders.
Common Asparagus Problems
Even well-tended asparagus beds run into trouble sometimes. Here’s how to recognize and fix the most common issues.
Pests and diseases. Asparagus beetles are the most common pest, chewing on spears and foliage. Handpick them off in the early morning when they’re sluggish, or use an organic insecticidal soap for larger infestations. Fungal issues like rust or fusarium wilt show up as orange or brown discoloration on stems, usually worsened by poor air circulation, so space plants properly and avoid overhead watering.
Yellowing fronds. Some yellowing in fall is completely normal as the plant goes dormant. Yellowing during active growing season, though, often points to inconsistent watering, nutrient deficiency, or root stress, so check your watering routine and soil health first.
Poor spear production. This is usually a patience issue rather than a real problem, especially in years one and two. If mature plants are producing poorly, look at sunlight levels, competition from weeds, and whether you harvested too aggressively or too early in previous seasons.
How to fix each problem. Consistency is your best tool here. Regular watering, annual compost, proper spacing, and resisting the urge to over-harvest young beds solve the majority of asparagus problems before they start.
How to Harvest Asparagus
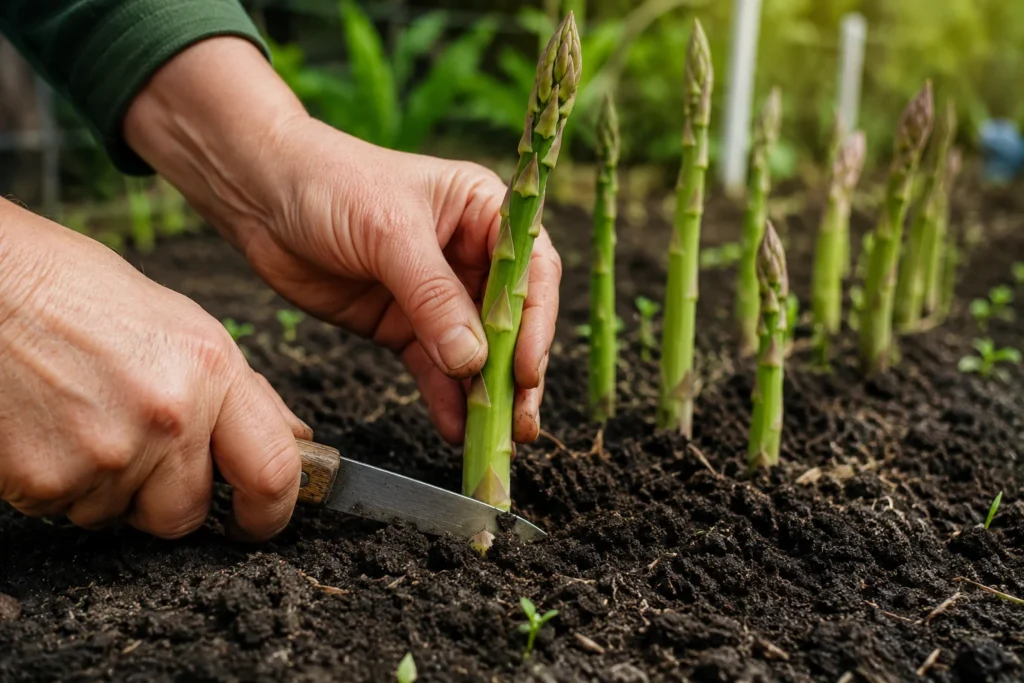
This is the part everyone’s been waiting for, and getting it right protects your bed for decades to come.
When to harvest, the year three rule. Don’t harvest at all in year one. In year two, you can take a very light harvest, just a few spears over one or two weeks, leaving the rest to grow into ferny foliage that feeds the roots. By year three, the bed is strong enough for a full harvest season.
How to cut correctly. Snap or cut spears when they’re 6 to 10 inches tall, cutting at or just below the soil line with a sharp knife, or simply snapping them by hand where they naturally break, which tends to avoid injuring nearby emerging spears.
How long harvest season lasts. Once established, harvest season typically runs 6 to 8 weeks in spring, cutting spears every day or two as they emerge. When spears start coming up thin and spindly, that’s your cue the season is winding down and it’s time to let the plant grow into foliage for the rest of the year.
Storage and cooking tips. Fresh asparagus is best used within a few days. Store it upright in a jar with an inch of water in the fridge, like a bouquet, to keep it crisp longer. Roasting with olive oil and a bit of salt at high heat for 10 to 12 minutes is about as simple and delicious as it gets.
Frequently Asked Questions
Expect two to three years from planting to a full harvest, depending on whether you start from crowns or seed.
Yes, as long as the container is deep and wide enough, at least 18 to 24 inches in each direction, with excellent drainage and winter protection for the roots.
Crowns go in a trench about 6 to 8 inches deep, covered initially with just 2 to 3 inches of soil and gradually filled in as shoots grow.
The most common causes are an immature bed still in its establishment years, too much shade, weed competition, or over-harvesting in previous seasons.
Early spring is ideal for both crowns and transplanted seedlings, right after the soil thaws and becomes workable.
A good rule of thumb is 10 to 15 plants per person in the household for a meaningful fresh harvest through the season.
Growing Asparagus Is a Long Game Worth Playing
If there’s one thing I hope you take from this guide, it’s that patience with asparagus isn’t a burden, it’s part of the reward. Every spring for years to come, that bed will greet you with spears before almost anything else in the garden wakes up, and there’s a quiet kind of pride in that.
Whichever path you choose, whether it’s crowns for a faster start, seed for the full experience from scratch, or a container for a smaller space, you now have everything you need to get growing. Asparagus grows beautifully alongside herbs like Foenegriek in a well-planned kitchen garden layout, so consider it good company as you plan your beds.
Give it good soil, steady care, and the time it’s asking for, and it will reward you for far longer than you’d expect from a single planting. Explore more plant guides over at plantstylehome.com to keep building out a garden you’ll be proud of for years to come.