If you’ve ever admired those gorgeous, rose-like flowers with layer upon layer of delicate petals at a wedding or flower shop, chances are you were looking at a ranunculus flower. These breathtaking blooms have captured the hearts of gardeners and flower lovers everywhere, and it’s easy to see why. With their vibrant colors, elegant shape, and surprisingly easy care requirements, ranunculus flowers deserve a special spot in your garden.
Let me walk you through everything you need to know about growing these beautiful flowers. Whether you’re a complete beginner or an experienced gardener looking to add something special to your landscape, this guide will help you grow stunning ranunculus flowers that’ll make your neighbors stop and stare.
What Makes the Ranunculus Flower So Special?
The ranunculus flower, often called the Persian buttercup, belongs to a large family of flowering plants that includes over 600 species. But when most people talk about ranunculus, they’re referring to Ranunculus asiaticus, the variety that’s become a favorite in gardens and floral arrangements worldwide.

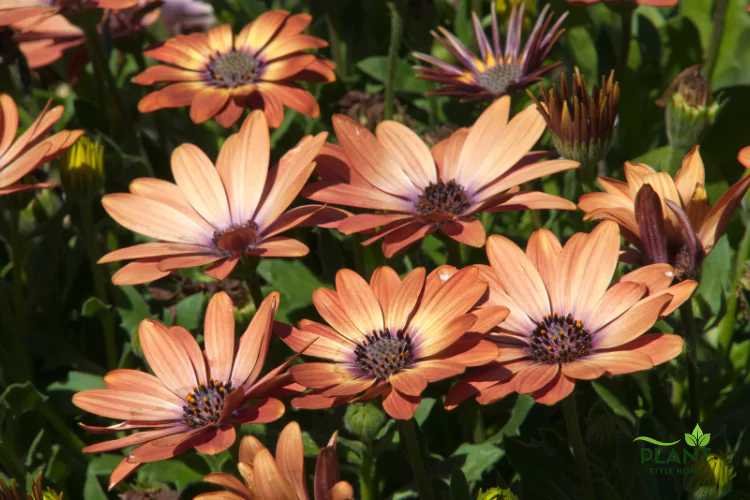
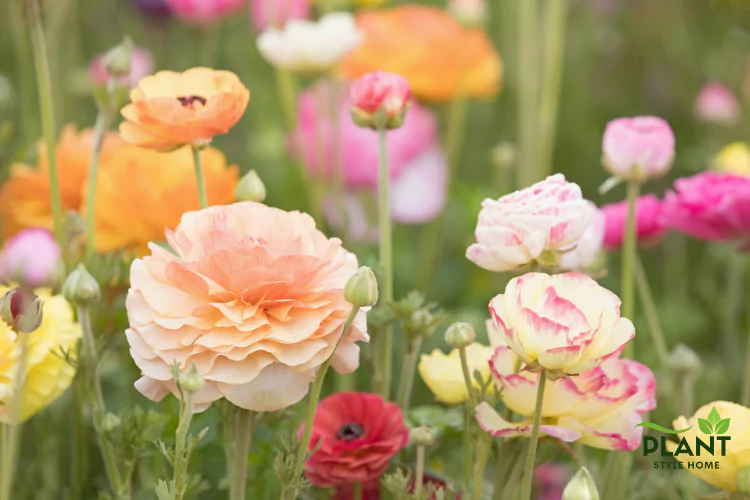
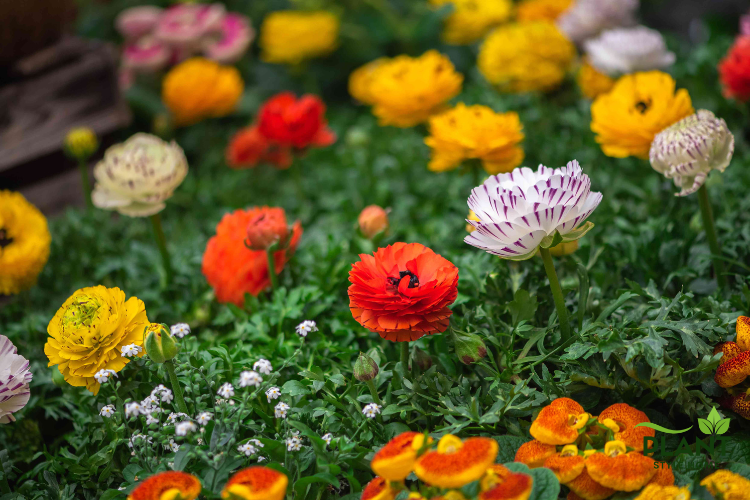
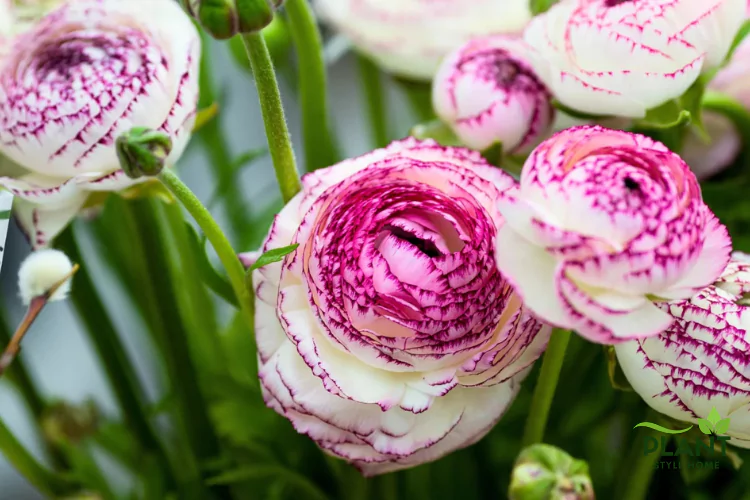
What sets these flowers apart is their incredible petal structure. Each bloom can have dozens of paper-thin petals arranged in tight, concentric circles that create a full, rounded appearance. Some people say they look like miniature roses, while others compare them to peonies. Either way, they’re absolutely stunning.
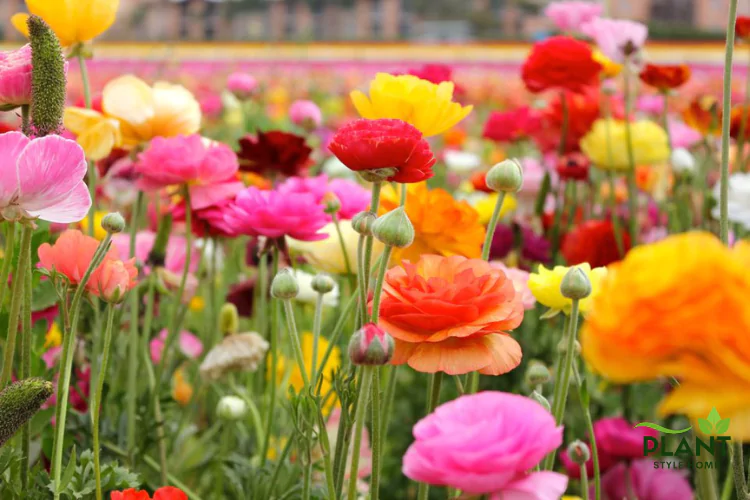
The color range is another reason why the ranunculus flower has become so popular. You can find them in practically every shade imaginable – from pure white and soft pastels to bold oranges, deep reds, and even purple tones. This variety makes them perfect for any garden color scheme or flower arrangement you can dream up. Many brides specifically request ranunculus flowers for their wedding bouquets because of their romantic appearance and long vase life.
Quick Facts About Ranunculus Flowers
- Bloom Time: Spring to early summer
- Height: 12 to 18 inches
- Hardiness: Best in USDA zones 7-10
- Sun Needs: Full sun to partial shade
- Water Requirements: Moderate
- Soil Type: Well-draining, rich soil
Understanding Ranunculus Flower Growth Basics
Before you start planting, it’s helpful to understand how ranunculus flowers grow. Unlike many other flowers that grow from seeds, ranunculus flower plants grow from corms. These corms look a bit like small, dried-up octopuses with their claw-like projections. Don’t let their odd appearance fool you – inside each corm is all the energy and nutrients your plant needs to produce those gorgeous blooms.
Ranunculus flowers are cool-season bloomers, which means they prefer temperatures between 45°F and 65°F. This is why they’re typically planted in fall or early spring, depending on your climate. In warmer areas, fall planting gives the corms time to establish roots during the cooler months, leading to spectacular spring blooms. In colder regions, early spring planting after the last frost works best.
The growth cycle of a ranunculus flower is fascinating to watch. After planting, you’ll first see small green shoots emerge from the soil. These will develop into ferny, delicate foliage that stays low to the ground. Then, as temperatures warm up slightly, tall stems shoot up from the center of the plant, each topped with a single bud. When those buds finally open, revealing layer after layer of beautiful petals, all your patience and care will feel totally worth it.
Choosing the Right Ranunculus Flower Corms
Success with ranunculus flowers starts with selecting quality corms. When you’re shopping for corms, whether online or at your local garden center, there are a few things to keep in mind. Size matters – larger corms (around 2.5 to 3 inches in diameter) will produce bigger, healthier plants with more flowers. Smaller corms can still bloom beautifully, but they might produce fewer stems.
Look for corms that feel firm and have a bit of weight to them. Avoid any that feel mushy, show signs of mold, or appear shriveled and dried out. Quality corms should have their characteristic claw-like projections intact. These aren’t roots yet, but they’re where the roots will emerge after planting.
Color selection is one of the fun parts of choosing ranunculus flower corms. Many suppliers offer mixed color collections, which can create a stunning rainbow effect in your garden. However, if you’re working with a specific color scheme, single-color varieties are available in most popular shades. Consider buying a few extra corms than you think you’ll need – it’s always better to have backup plants in case some don’t sprout.
What to Look for When Buying Corms
- Firm texture without soft spots
- Size of 2.5-3 inches for best results
- No visible mold or decay
- Intact claw-like projections
- Purchase from reputable suppliers
Perfect Growing Conditions for Ranunculus Flowers
Creating the right environment for your ranunculus flower plants is crucial for success. These flowers have specific preferences, but once you understand what they need, they’re actually quite forgiving. The most important factor is sunlight. Ranunculus flowers love bright, direct sunlight for at least six hours daily. In extremely hot climates (zones 9-10), providing some afternoon shade can help prevent the blooms from fading too quickly.
Soil quality can make or break your ranunculus growing experience. These plants absolutely must have well-draining soil. Their corms are prone to rotting if they sit in waterlogged conditions. The ideal soil is loose, rich in organic matter, and drains quickly after watering. If you have heavy clay soil, consider amending it with compost and sand, or grow your ranunculus flowers in raised beds or containers instead.
Temperature is another key consideration. Remember, ranunculus flowers are cool-season bloomers. They’ll thrive when daytime temperatures stay between 45°F and 65°F. Once temperatures consistently climb above 70°F, the plants will start to decline and eventually go dormant. This natural cycle means you’ll enjoy several weeks of gorgeous blooms during the cooler part of the year.
Air circulation around your ranunculus flower plants helps prevent fungal diseases like powdery mildew. When planting, space your corms about 4 to 6 inches apart. This spacing gives each plant room to grow while ensuring good airflow between them. In container gardens, avoid overcrowding – three to five corms in a 12-inch pot is plenty.
Step-by-Step Guide to Planting Ranunculus Flowers
Now comes the exciting part – actually planting your ranunculus flower corms! There’s a special technique that’ll give you the best results, and while it takes a little extra time upfront, it’s absolutely worth it. Many experienced gardeners swear by pre-soaking and pre-sprouting their corms before planting them in their final location.
Start by filling a shallow container with room-temperature water. Place your corms in the water and let them soak for about three to four hours. You’ll notice they start to plump up and expand as they absorb moisture. Don’t soak them longer than four hours, as this can actually damage the corms. After soaking, you can plant directly, or take the extra step of pre-sprouting.
To pre-sprout your ranunculus flower corms, place them in a tray filled with slightly damp potting mix. Cover them lightly with about an inch of soil. Store the tray in a cool, dark place (around 50-55°F) for about seven to ten days. During this time, small roots and possibly tiny shoots will begin to develop. This gives your plants a head start and can lead to earlier, more abundant blooms.
When you’re ready to plant in the garden or containers, dig holes about 2 inches deep. Here’s the tricky part – the claw-like projections on the corms should point downward, not upward. This might seem counterintuitive, but those “claws” are where the roots emerge. Place each corm in its hole with the claws pointing down and the rounded top facing up. Cover with soil and water gently.
Planting Timeline for Success
Fall Planting (Zones 8-10):
- Plant in October or November
- Blooms appear in March or April
- Provides longest flowering period
Spring Planting (Zones 7 and colder):
- Plant after last frost danger passes
- Pre-sprouting is especially helpful
- Blooms appear 90-100 days after planting
Watering Your Ranunculus Flower Plants
Getting the watering right is one of the most important aspects of ranunculus flower care. These plants have a bit of a “Goldilocks” situation with water – they don’t want too much, but they also don’t want too little. Finding that sweet spot is key to healthy plants and abundant blooms.
After planting, water your corms gently to settle the soil around them. Then, here’s the surprising part – back off on the watering for the first week or two. The corms have enough stored moisture and energy to begin their growth. Overwatering at this stage is one of the main reasons corms rot before they even sprout. Once you see green shoots emerging from the soil, you can begin a regular watering schedule.
During the active growing season, ranunculus flowers prefer consistently moist (but never soggy) soil. Water deeply when the top inch of soil feels dry to the touch. Early morning watering is ideal because it gives the foliage time to dry during the day, reducing the risk of fungal diseases. Avoid overhead watering if possible – use a soaker hose or water at the base of the plants instead.
As the season progresses and your ranunculus flower plants finish blooming, gradually reduce watering. Once the foliage starts to yellow and die back naturally, stop watering altogether. This signals to the plant that it’s time to go dormant, and it allows the corms to dry properly if you plan to store them for replanting next year.
Feeding and Fertilizing Ranunculus Flowers
Ranunculus flower plants aren’t particularly heavy feeders, but a little extra nutrition can make a noticeable difference in bloom quality and quantity. The best approach is to start with good soil and supplement with light fertilization throughout the growing season. When you prepare your planting bed, mix in some well-aged compost or organic matter. This provides a slow, steady release of nutrients that’ll support your plants all season long.
Once your ranunculus flowers start actively growing and producing foliage, you can begin supplemental feeding. Choose a balanced, water-soluble fertilizer with equal or near-equal amounts of nitrogen, phosphorus, and potassium (something like a 10-10-10 or 5-5-5 formulation). Dilute it to half the recommended strength and apply every two to three weeks.
When you see buds beginning to form, you can switch to a fertilizer with slightly higher phosphorus (the middle number in the N-P-K ratio). This encourages better bloom development. However, don’t overdo it with fertilizer – too much nitrogen can lead to lush, green foliage with fewer flowers. It’s always better to under-fertilize than over-fertilize with ranunculus flower plants.
Dealing with Common Ranunculus Flower Problems
Even with the best care, you might encounter some challenges when growing ranunculus flowers. The good news is that most problems are preventable or easily treatable if you catch them early. Let’s talk about the most common issues and how to handle them.
Powdery mildew is probably the most frequent problem with ranunculus flowers. It appears as a white, powdery coating on the leaves and stems. This fungal disease thrives in humid conditions with poor air circulation. Prevention is your best defense – proper spacing, morning watering, and good airflow go a long way. If you do notice powdery mildew, remove affected leaves and treat with an organic fungicide if needed.
Aphids love ranunculus flower plants, especially the tender new growth and developing buds. These tiny insects suck plant sap and can weaken your plants while spreading diseases. Check your plants regularly, especially on the undersides of leaves. A strong spray of water can knock aphids off, or you can use insecticidal soap for heavier infestations. Encouraging beneficial insects like ladybugs will help keep aphid populations under control naturally.
Root rot happens when corms sit in waterlogged soil. The first sign is usually yellowing leaves and stunted growth. Unfortunately, by the time you notice symptoms above ground, the damage below ground is often severe. Prevention is really the only cure here – make absolutely sure your soil drains well, and don’t overwater, especially during the first few weeks after planting.
Troubleshooting Quick Reference
| Problem | Symptoms | Solution |
|---|---|---|
| Powdery Mildew | White coating on leaves | Improve airflow, morning watering |
| Aphids | Curled leaves, sticky residue | Water spray, insecticidal soap |
| Root Rot | Yellow leaves, mushy corms | Improve drainage, reduce watering |
| No Blooms | Healthy foliage, no flowers | More sun, reduce nitrogen fertilizer |
| Wilting | Drooping despite moist soil | Check for root damage, provide shade |
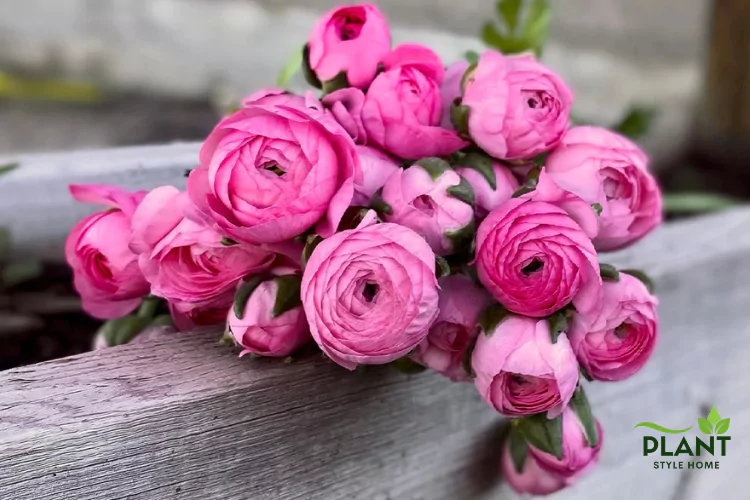
Harvesting Ranunculus Flowers for Arrangements
One of the best things about growing ranunculus flowers is cutting them for indoor arrangements. These blooms have an excellent vase life, lasting up to two weeks with proper care. Knowing when and how to cut them makes all the difference in how long they’ll last and how beautiful they’ll look in your vase.
The best time to cut ranunculus flowers is when the buds are just beginning to show color but haven’t fully opened yet. They’ll continue to open after cutting, and you’ll get to enjoy the full unfolding process indoors. Early morning is the ideal time for cutting – the stems are full of water and the flowers are at their freshest. Use clean, sharp scissors or pruning shears, and cut stems at a 45-degree angle. This increases the surface area for water uptake.
Immediately after cutting, place your ranunculus flower stems in a bucket of room-temperature water. Remove any leaves that would sit below the water line in your vase – these would only rot and create bacteria. Before arranging, recut the stems underwater if possible. This prevents air bubbles from forming in the stem, which can block water uptake.
Change the water in your vase every two to three days, and recut the stems each time. Keep your arrangement away from direct sunlight, heating vents, and fruit (which releases ethylene gas that can shorten flower life). With this care, your ranunculus flower arrangement will stay beautiful for many days, brightening up your home with those gorgeous, layered blooms.
Storing Ranunculus Flower Corms
In zones 7 and warmer, you can often leave ranunculus flower corms in the ground year-round, and they’ll come back on their own. However, in colder areas, or if you want to guarantee success next season, digging up and storing the corms is your best bet. The process is straightforward and gives you the chance to divide any corms that have multiplied.
Wait until your ranunculus flowers have finished blooming and the foliage has completely yellowed and died back. This usually happens in late spring or early summer. Don’t cut back the foliage while it’s still green – the plants need this time to transfer energy back into the corms for next year’s growth. Once everything is brown and crispy, it’s time to dig.
Carefully lift the corms from the soil using a garden fork, being careful not to damage them. Brush off excess soil, but don’t wash them – moisture can lead to rot during storage. You might notice that some of your original corms have produced small offsets. These baby corms can be separated and planted next season for more ranunculus flower plants.
Spread the corms out in a single layer in a well-ventilated area away from direct sunlight. Let them dry completely for about a week. Once dried, store them in a paper bag, cardboard box, or mesh bag – anything that allows air circulation. Keep them in a cool, dry place (around 50-55°F is ideal) until it’s time to plant again next season.
Creative Ways to Use Ranunculus Flowers in Your Garden
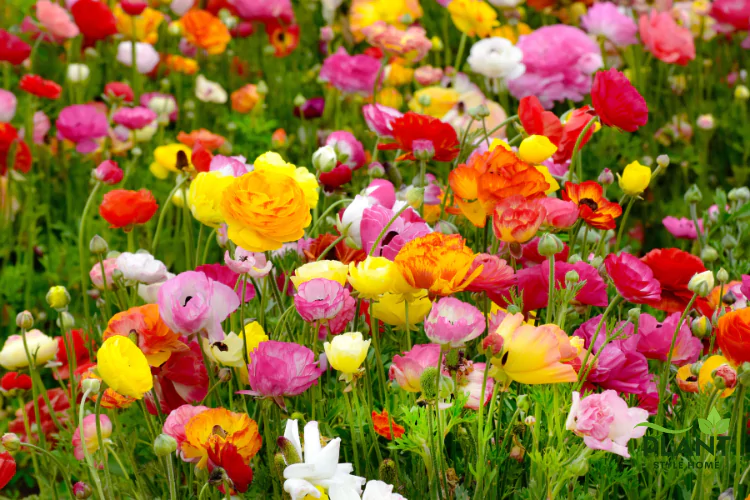
Ranunculus flowers are incredibly versatile in garden design. Their medium height and compact growth habit make them perfect for various planting situations. In traditional garden beds, plant them in groups of at least five to seven corms of the same color for maximum visual impact. Mass plantings of ranunculus flowers create stunning color displays that’ll stop traffic.
Container gardening is where ranunculus flowers really shine. Their relatively shallow root system makes them perfect for pots, and containers allow you to control soil quality and drainage perfectly. Try planting a large pot with a single color for a sophisticated look, or mix several shades for a cheerful, cottage-garden feel. Place containers on patios, porches, or steps where you can enjoy the blooms up close.
Border plantings are another excellent use for ranunculus flowers. Their neat, compact form and medium height make them ideal for edging pathways or defining garden spaces. Pair them with other cool-season bloomers like snapdragons, pansies, or sweet peas for extended color. The ferny foliage of ranunculus flowers provides a nice textural contrast to broader-leaved plants.
Don’t forget about cutting gardens! If you love fresh flowers in your home, dedicate a section of your garden specifically to ranunculus flowers for cutting. Plant them in rows for easy access and maintenance. You’ll be able to cut armfuls of blooms without feeling like you’re decimating your landscape display.
Key Takeaways
Growing ranunculus flowers is a rewarding experience that any gardener can enjoy. Here’s what you need to remember:
- Start with quality corms that are firm and properly sized for the best results
- Soil drainage is critical – these plants will not tolerate wet feet
- Cool temperatures bring out the best blooms; they prefer 45-65°F
- Pre-soaking and pre-sprouting gives your corms a strong start
- Plant with claws pointing down – this seems backward but it’s correct
- Water carefully – more plants fail from overwatering than underwatering
- Full sun produces the most abundant flowers and strongest stems
- Cut flowers last up to two weeks in vases with proper care
- Spacing matters for plant health and air circulation
- Corms can be stored and replanted year after year in most climates
Ranunculus Flower Care Calendar
| Season | Task | Details |
|---|---|---|
| Fall (Zones 8-10) | Planting | Pre-soak corms, plant 2 inches deep |
| Spring (All Zones) | Planting | After last frost in colder zones |
| Spring | Fertilizing | Begin when foliage appears, every 2-3 weeks |
| Spring | Maintenance | Water consistently, watch for pests |
| Late Spring | Harvesting | Cut blooms for arrangements |
| Early Summer | Storage Prep | Let foliage die back naturally |
| Summer | Storage | Lift, dry, and store corms in cool location |
Conclusion
The ranunculus flower truly deserves its place as one of the most beloved spring bloomers. With their incredible petal-packed blooms, gorgeous color range, and surprisingly manageable care requirements, these flowers offer something special for every gardener. Whether you’re planting just a few corms in a container on your porch or filling an entire cutting garden with rows of ranunculus flowers, you’re in for a treat when those first buds begin to open.
Yes, they require a bit more attention than tossing some seeds in the ground, but the payoff is absolutely worth it. There’s something magical about watching those odd-looking corms transform into elegant plants loaded with rose-like blooms. The time and care you invest in your ranunculus flowers will reward you with weeks of stunning color and armfuls of gorgeous cut flowers.
So grab some corms, prepare your soil, and get ready to fall in love with ranunculus flowers. Your garden (and your vases) will thank you!
Frequently Asked Questions
How long do ranunculus flowers bloom?
Ranunculus flowers typically bloom for 4 to 6 weeks during their growing season. Individual flowers can last about a week on the plant, but the plant continues producing new blooms throughout the blooming period. In arrangements, cut ranunculus flowers can last 7 to 14 days with proper care.
Can I grow ranunculus flowers from seed?
While it’s possible to grow ranunculus flowers from seed, it’s not commonly done because it takes much longer (up to two years) to get blooms. Growing from corms is faster, more reliable, and produces flowers in the same season. Seeds are mainly used by breeders developing new varieties.
Are ranunculus flowers toxic to pets?
Yes, ranunculus flowers are toxic to cats, dogs, and other pets if ingested. They contain compounds that can cause stomach upset, drooling, vomiting, and diarrhea. Keep plants out of reach of curious pets, and contact your veterinarian if you suspect your pet has eaten any part of the plant.
Why aren’t my ranunculus flowers blooming?
Several factors can prevent blooming: insufficient sunlight (they need at least 6 hours), too much nitrogen fertilizer (which promotes leaves over flowers), incorrect planting depth, or corms planted upside down. Temperature extremes can also affect blooming – they need cool weather to thrive.
Can ranunculus flowers survive frost?
Established ranunculus flower plants can tolerate light frosts down to about 25-28°F for short periods. However, newly planted corms and tender new growth are more sensitive. In areas with hard freezes, wait until frost danger passes before planting, or provide frost protection with row covers.
How many flowers does one ranunculus corm produce?
A healthy ranunculus flower corm typically produces 3 to 7 flowering stems, depending on the size of the corm and growing conditions. Larger corms (2.5-3 inches) will produce more stems than smaller ones. Optimal care, including proper fertilization and consistent watering, encourages maximum bloom production.
Do ranunculus flowers come back every year?
In zones 8-10, ranunculus flowers can be treated as perennials and may return year after year if left in the ground with mulch protection. In colder zones, they’re grown as annuals, but you can dig up and store the corms to replant next season. Stored corms can be reused for several years.